
How can we help?
How do I install my new PacketSky router?
Your PacketSky router will normally be supplied preconfigured and ready to connect.
Follow the steps below to connect it to the fibre device and get your phones, computers and other devices online.
Important: Do not press the reset button on the router. A factory reset may remove the PacketSky configuration and prevent the service from connecting.
Before you begin
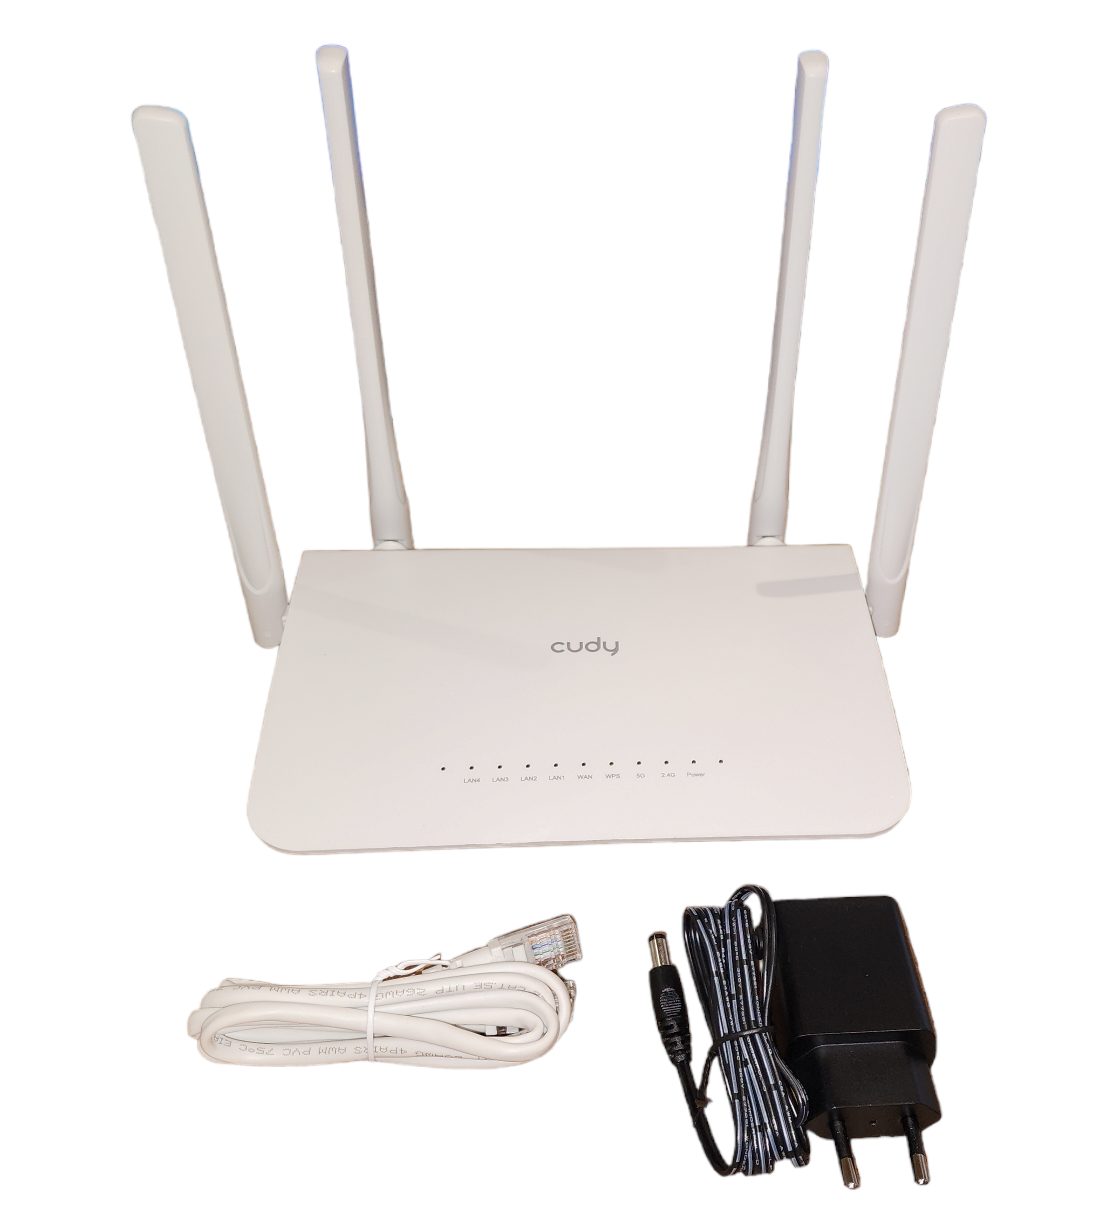
Your router package should include:
- The PacketSky router
- A power adapter
- An Ethernet cable
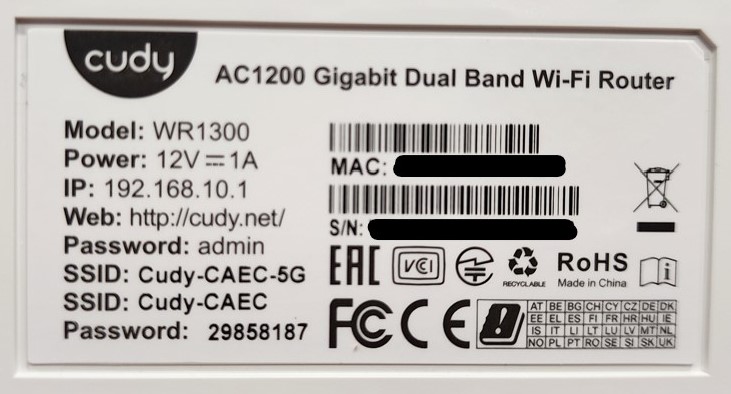
- Wi-Fi connection details on the router label
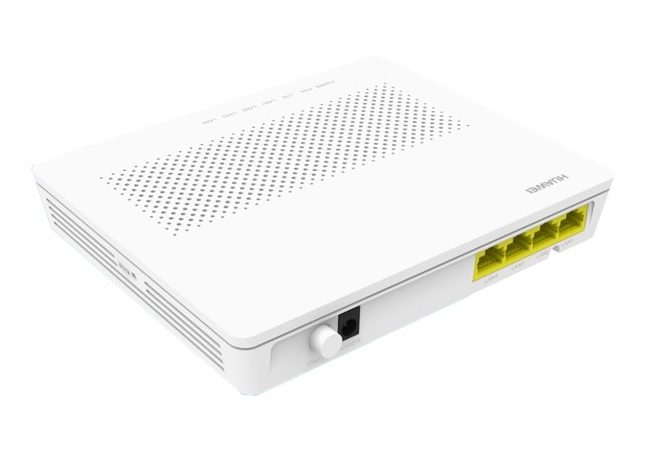
You will also need access to the fibre device already installed at the property. This is commonly called an ONT or CPE.
The appearance of the fibre device differs depending on the Fibre Network Operator.
Step 1: Check the fibre device
Confirm that the fibre device:
- Is connected to power
- Is switched on
- Has lights displaying
- Has not been unplugged or damaged
- Has an available Ethernet or LAN port
The correct port is commonly labelled:
- LAN1
- ETH1
- GE1
- Internet
The label may differ depending on the model and network.
Step 2: Connect the router to the fibre device
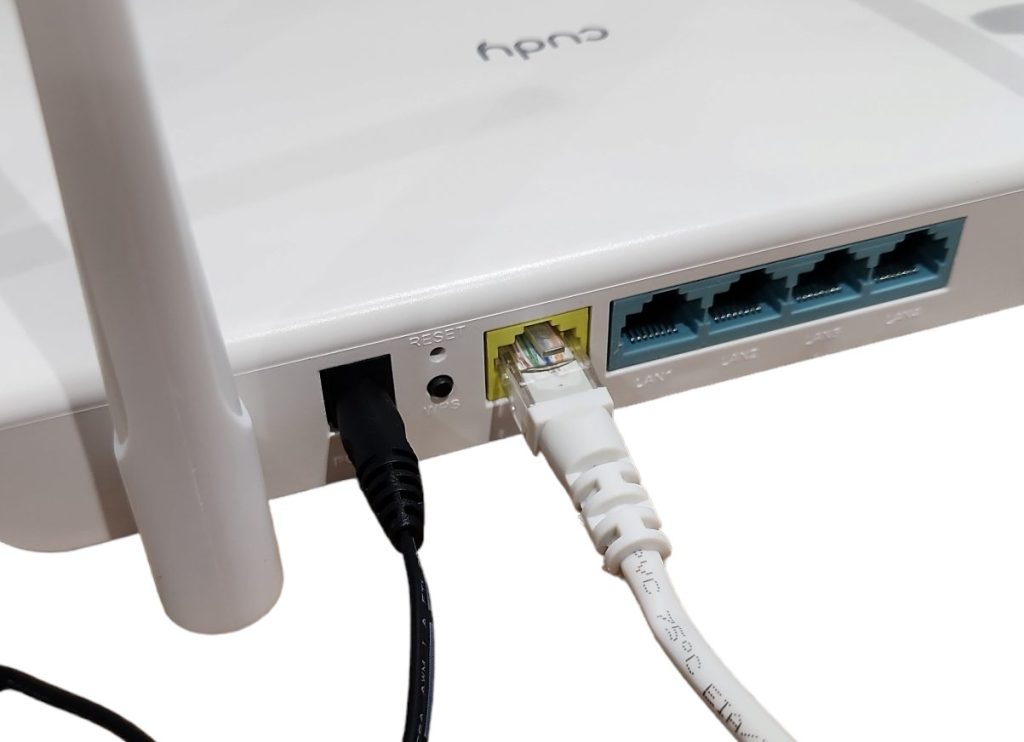
Connect one end of the Ethernet cable to the correct LAN or Ethernet port on the fibre device.
Connect the other end to the router’s WAN or Internet port.
The WAN port is often a different colour from the router’s normal LAN ports.
Do not connect the fibre device to one of the router’s LAN ports unless PacketSky has specifically instructed you to do so.
Step 3: Connect the router to power
Plug the router’s power adapter into the router and then into a wall socket or surge protector.
Switch the power on.
The router’s lights may flash while it starts. Allow approximately three to five minutes for the router to boot and establish a connection.
Do not repeatedly switch the router off and on during this process.
Step 4: Connect to Wi-Fi
Look for the router’s Wi-Fi name and password on:
- The label underneath or behind the router
- A PacketSky information card
- The installation information supplied with the router
On your phone, computer or other device:
- Open the Wi-Fi settings.
- Select the PacketSky router’s Wi-Fi name.
- Enter the supplied password.
- Wait for the device to connect.
- Open a website to test the connection.
Some routers broadcast separate 2.4 GHz and 5 GHz Wi-Fi names.
Use 5 GHz when you are close to the router and want higher speeds. Use 2.4 GHz where greater range is more important.
Step 5: Connect fixed devices using Ethernet
Where practical, connect devices that remain in one place directly to the router using Ethernet cables.
Suitable devices include:
- Desktop computers
- Smart televisions
- Gaming consoles
- Streaming devices
- Network storage
- Security-camera recorders
- Work-from-home computers
Ethernet normally provides a more stable connection than Wi-Fi.
Step 6: Test the service
Test the connection using more than one device.
Confirm that:
- The Wi-Fi network is visible
- Devices can connect
- Websites load
- The router’s WAN or Internet light is active, where applicable
- The fibre device does not show a red warning or LOS light
If Wi-Fi works but the speed is poor, complete a wired speed test before reporting a fault.
The router is connected but there is no internet
Check that:
- The Ethernet cable is firmly connected at both ends
- It is connected to the router’s WAN port
- The fibre device is powered on
- The fibre device does not show a red LOS or Alarm light
- The PacketSky service has been activated
- The router has not been factory-reset
Restart the equipment once:
- Switch off the router and fibre device.
- Wait approximately 60 seconds.
- Switch the fibre device on first.
- Wait two to three minutes.
- Switch the router on.
- Allow another three to five minutes before testing.
Still unable to connect?
Log a support ticket through the PacketSky Customer Portal.